Monday, October 26, 2015

Simon Says Stamp November 2015 Card Kit Winner!

Hi everyone!
I'm poppy by to announce the winner of the fabulous Simon Says Stamp November 2015 Card Kit: Handmade With Love!

The winner is....
Blogger Lynne in NI who said...
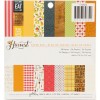
Awwww what a sweet little squirrel!

Congrats, Lynne! Please email me via my sidebar with your shipping info so I can pass it on to the wonderful folks at Simon Says Stamp

Just a reminder that you can pick up the Simon Says Stamp November 2015 Card Kit for just $29.95 + shipping. If you'd like to receive this kit and future kits for only $24.95 + shipping per month, you can SUBSCRIBE HERE.
Thanks for stopping by!
Sarah

Friday, October 23, 2015

SSS Apple of My Pie Card (& November Card Kit GIVEAWAY)

Hi everyone!

I'm back today with another card made using the Simon Says Stamp November 2015 Card Kit: Handmade With Love!

Here's the wonderful autumn-themed kit once again:


Here's today's quick and easy card:


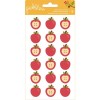
The Pebbles Inc. Apple Puffy Stickers are just so cute I had to let them play center stage on this card along with the sweet sentiment from Simon's Apple of My Pie Stamps.

Supplies:


You can pick up the Simon Says Stamp November 2015 Card Kit for just $29.95 + shipping. If you'd like to receive this kit and future kits for only $24.95 + shipping per month, you can SUBSCRIBE HERE.

Heidi, sweet owner of Simon Says Stamp, has given me an extra 
Simon Says Stamp November 2015 Card Kit to pass on to one of you! Just leave a comment on any or all of my November Card Kit blog posts and I'll announce a winner Monday, October 26th.

Thanks so much for stopping by!
Sarah

Monday, October 19, 2015

Simon Says Stamp Thankful Squirrel Card (using Simon's November Card Kit + a GIVEAWAY)!

Hi everyone!

I'm back today with another card made using the Simon Says Stamp November 2015 Card Kit: Handmade With Love!

Here's the wonderful autumn-themed kit once again:


Here's today's card:


First, I stamped the Grateful sentiment with Simon's Cloudy Sky Dye Ink repeatedly onto Simon's Sea Glass Cardstock. I added a few strips of the Pebbles Inc. Harvest 6x6 Papers to the bottom and die cut the panel using the rectangle die from Simon's Bundle of Stitches DiesOnce again I used one of the fabulous Pebbles Harvest Chips Printed Cardstock Shapes (the cute little squirrel) and adhered it to my card with foam adhesive.  I die cut some hearts from Simon's Burnt Orange Cardstock using Simon's Large Holiday Shapes and Holiday Shapes Dies. I then coloured them with my R29 Lipstick Red Copic Marker to better match the rest of the card and stamped 'Thank You' with Versafine Onyx Black Ink Pad. The largest heart was adhered with foam adhesive and the smaller ones with an adhesive tape runner. Finally, the panel was adhered to one of Simon's White A2 Side Folded  Cards.

Supplies:


Friday, October 16, 2015

Simon Says Stamp Create Joy Blog Hop! & GIVEAWAY!

Hi everyone!

Welcome to the Simon Says Stamp Create Joy Blog Hop! You should be arriving from the very talented Yoonsun Hur's blog. If not, you can start the hop at the Simon Says Stamp Blog. Be sure to comment at each blog along the way for you chance to win one of the prize packages valued at about $50. Winners will be be chosen this coming Monday and announced on the Simon Says Stamp Blog.

In case you missed it, here is the fabulous Create Joy Release in it's entirety:


Here are the cards I'm sharing for today's hop, both using the stunning new So Very Merry Stamp Set created by Tammy Tutterow for Simon Says Stamp.


For both cards, I die cut a rectangle from some Tim Holtz Distress Watercolor Cardstock using one of Simon's Stitched Rectangle Dies. I then scribbled some Colbalt Blue Zig Clean Color Marker on them, spritzed them with water, and let them dry. Once dry, I stamped the So Very Merry images with Memento Tuxedo Black Ink and used my Copic Markers to colour them.

For my first card, I added some Glossy Accents to the Christmas ornaments and a touch of Wink of Stella Clear Glitter Marker to the 'noel' sentiment and the star at the top of the tree. I then added the panel to a Hero Arts notecard stamped with Simon's Diagonal Stripes Background Stamp using Simon's Lipstick Red Ink.


For the second card, I finished off the panel with some die cut stars from Simon's Holiday Shapes Dies (which I covered with Glossy Accents). I used one of Simon's Wavy Scallop Stitches border dies to create some grass on my pool coloured notecard and used foam adhesive to adhere the stamped panel to my card.

Supplies:


To see what I created with Simon's wonderful new Lattice Grid Stamp look HERE.

You're next stop is the fabulous Yana Smakula's blog.

Thanks for stopping by!
Sarah