Hi everyone!
I'm excited to be sharing today's card with you for a few reasons. First off, the products I'm featuring were designed by my sweet friend Lucy Abrams who I finally got to meet in real life (along with her adorable family) last month after knowing her online for over 6 years. She is as wonderful in person as I imagined she would be. Secondly, I've been hoarding her gorgeous Shaker Selections. I have 12 different selections (and more on the way). They are STUNNING! Yay for putting some on a card, lol! ;) Thirdly, the fun Circle Hooray Die Lucy designed for Clearly Besotted showed up a couple of days ago in my Simon Says Stamp order. I've been planning this card for a bit now and was able to grab the die when it came back in stock. Now I'm stalking Lucy's Clear Besotted Diamond Thanks Die, waiting for it to be restocked too. (As of the writing of this post, all of Lucy's other Shaker Shape Dies are in stock at Simon).
After that long introduction, here's my card:

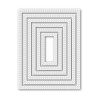
I started this card by diecutting Simon's largest Stitched Rectangle Die as well as the Circle Hooray Die from a piece of White Fun Foam as well as from a piece of Neenah White Cardstock. I then adhered a scrap of cardstock to the back of the Fun Foam, added Lucy's Flamingo Sparkly Shaker Selection to the area above the Hooray sentiment and her Forget-Me-Not Sparkly Shaker Selection below. The foam 'Hooray' forms a natural barrier between the colours. I cut out a piece of acetate from a Hero Arts Acetate Notecard, brushed over it with my EK Success Powder Tool to reduce static, and adhered it over the entire opening. I took the diecut cardstock panel and blended Abandoned Coral Distress Ink at the top and Shaded Lilac Distress Ink at the bottom. I spritzed some Shimmer Spritz on the panel, let it dry, and adhered it over the fun foam piece before adhering it all to a card base. Finally, I adhered a few individual components from Lucy's Shaker Selections using Multi Medium Matte Adhesive. I'm so happy with how this card turned out and think the Hooray sentiment is great for so many different occasions: birthday, baby, graduation, etc.
Before I go, I thougth I'd mention that yesterday Jennifer McGuire posted an AMAZING clear shaker card on her blog using some of Lucy's Shaker Selections and she has a discount code for 15% off Lucy's Shaker Selections! Visit her blog to see her fabulous card and get the discount code! It's good through 7/15/15.
I also wanted to quickly share how I've been storing my Shaker Selections. I'm a tea drinker and David's Teas are some of my favourites. They have some great gift boxes that include these little tins of teas. Once I finish a flavour I repurpose the tin for Lucy's Shaker Selections. They are the perfect size! I've kept my gift box too so I can store all the tins together. I'm out of tins so it's time to buy more tea. ;)

Supplies:
 |  |  |  |  |
 |  |  |  |  |
 |  |  |  |  |
 |  |  |  |  |
 |